Demod
Networked SDR receiver — User Guide
Demod turns your iPhone or iPad into the front panel of a software-defined radio somewhere else in the world. Connect to a receiver, watch the spectrum, tune, and listen — or decode CW, RTTY, PSK31 and FT8.
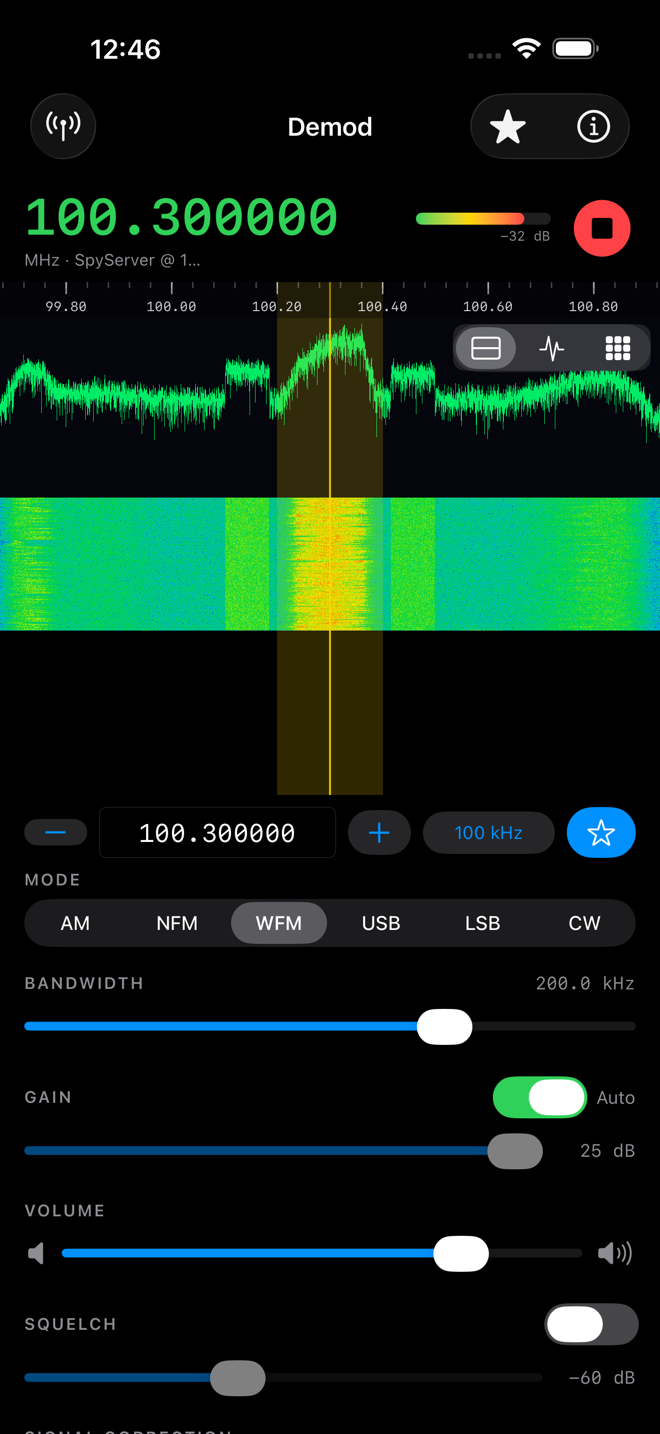
1 Quick start
- Tap the antenna icon (top-left) to open Connection.
- Tap Browse public servers to pick a free public receiver, or enter your own server's Host / IP and Port.
- Tap a server (or Connect) — you'll see a live waterfall and hear audio.
- Tap the display to tune, pinch to zoom, and choose a Mode.
The big green play button in the header connects and disconnects at any time. Everything you set — server, frequency, mode, controls — is remembered and restored the next time you open the app.
2 Connecting to a receiver
Open Connection from the antenna icon and pick a Type. Demod fills in that type's usual port automatically; enter the Host / IP and Port, then tap Connect.
| Type | Port | What it is |
|---|---|---|
| rtl_tcp | 1234 | RTL-SDR.com / rtl_tcp — raw 8-bit I/Q, demodulated on your device. |
| SpyServer | 5555 | Airspy SpyServer — 8/16-bit I/Q, demodulated on your device. |
| KiwiSDR | 8073 | KiwiSDR HF web receiver — audio & waterfall come from the server. |
Once connected, Connect becomes Reconnect and a Disconnect button appears. The Status line shows the device name and data rate when you're live.
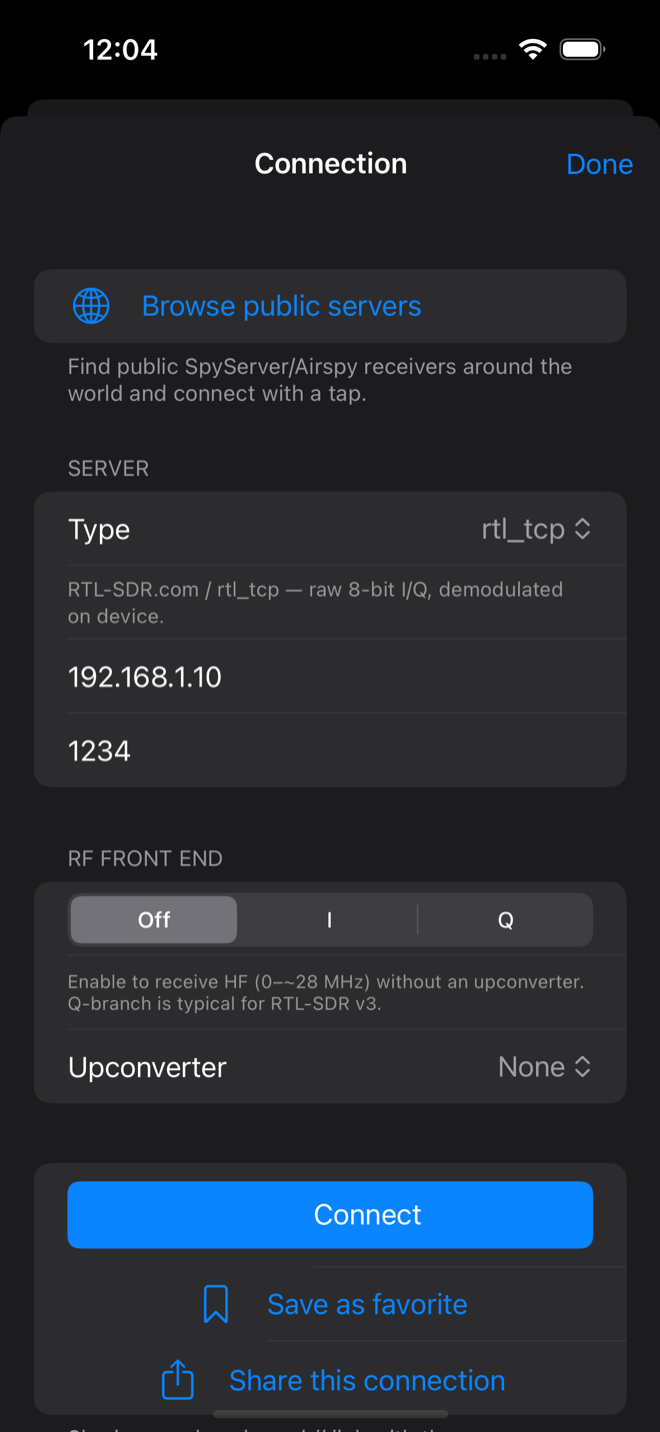
rtl_tcp — receiving HF
For an RTL-SDR dongle, an extra RF Front End section appears:
- Direct Sampling — Off / I / Q. Enable to receive HF (0–~28 MHz) without an upconverter; Q is typical for the RTL-SDR v3.
- Upconverter — None, Ham It Up (125 MHz), SpyVerter (120 MHz), or Custom. With one set, just tune to the real frequency — Demod applies the offset for you.
Saved servers & favorites
Servers you've used appear under Saved Servers — tap to reload, swipe to delete. Save as favorite keeps the current server and its tuning as a named station (see Saving & recall).
3 Browsing public servers
Tap Browse public servers for a live directory of free public SpyServer / Airspy receivers around the world.
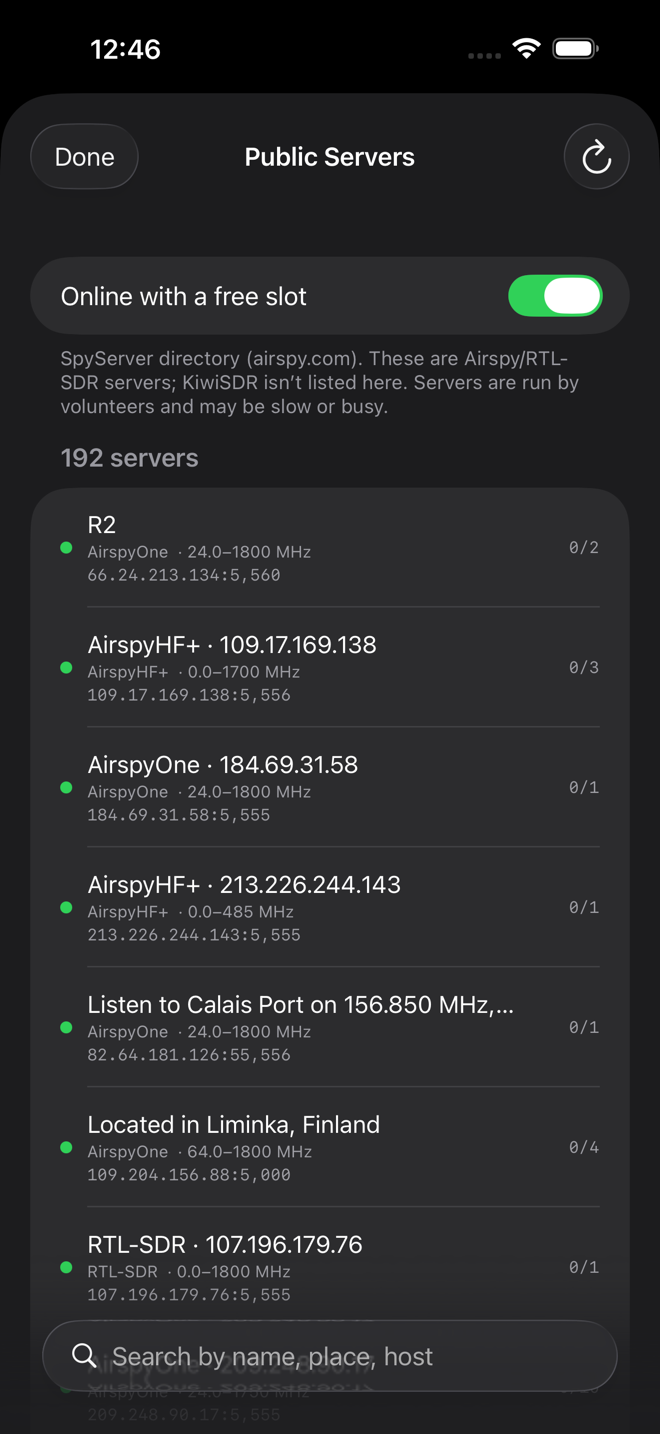
- Search by name, place or host; toggle Online with a free slot to hide busy/offline servers.
- Sort by Availability, Fewest users, Ping (fastest), or Name.
- Status dot: green = free slot, yellow = full, gray = offline. Swipe a row to add it to Favorites.
KiwiSDR isn't in this list. The public browser covers Airspy/SpyServer receivers only. To use a KiwiSDR, choose KiwiSDR as the Type and enter its host and port (usually 8073) by hand — public KiwiSDRs are listed at kiwisdr.com/public.
4 Tuning & the display
The header shows the tuned frequency in MHz to six decimals, an S-meter with a
dB readout, and the data rate. Below it is the spectrum/waterfall.
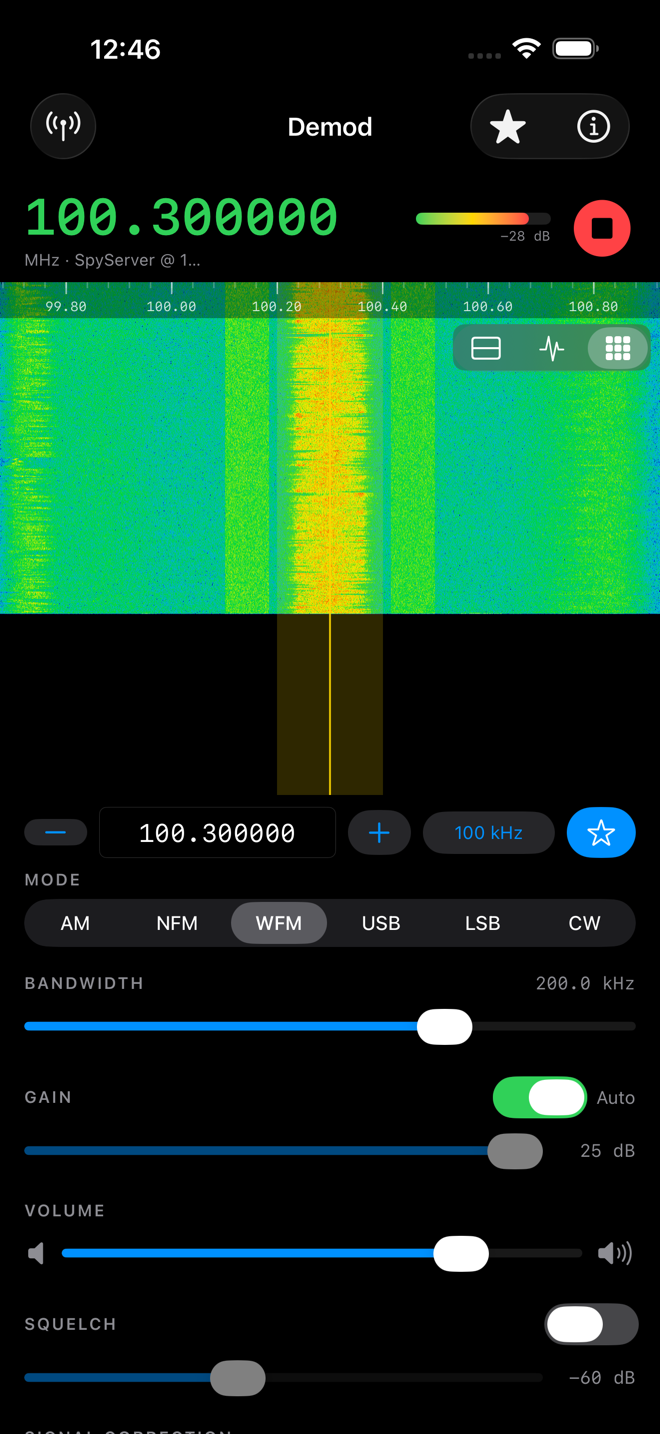
Display modes
The Display switch (top-right of the display) chooses Split (spectrum above, waterfall below), Spectrum only, or Waterfall only. A yellow band marks the passband; a bright line marks the tuned frequency.
Gestures
| Gesture | What it does |
|---|---|
| Tap the display | Tune to that spot. |
| Drag (one finger) | Fine-tune — the tuning line follows your finger. |
| Pinch | Zoom the view (1×–50×), anchored under your fingers. |
| Double-tap | Toggle zoom — in to 8× at that point, or back out to 1×. |
| Two-finger drag | Pan the zoomed view without changing tuning. |
| Drag the big frequency number | Scrub up/down; the digit under your finger sets the step size. |
The tuning bar
Under the display: −/+ buttons step by the current step size, a MHz field lets you type a frequency directly, and a step-size menu selects the step (1 kHz up to 1 MHz). The star button saves the current frequency.
5 Modes
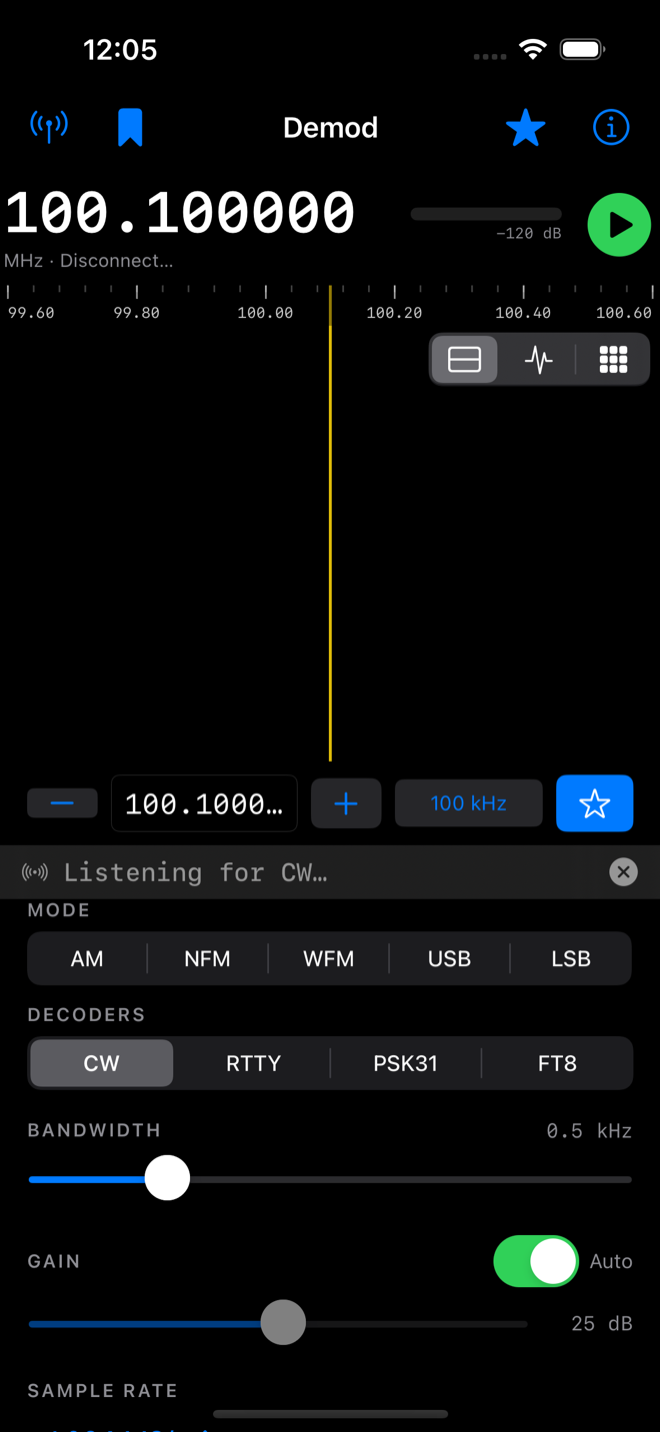
Modes live in the Controls. The MODE row holds the voice modes and the DECODERS row holds the data modes — picking one clears the other, so exactly one mode is active. Each mode remembers its own bandwidth.
| Mode | Default BW | Range | Use |
|---|---|---|---|
| AM | 10 kHz | 3–20 kHz | Shortwave / airband voice. |
| NFM | 12.5 kHz | 6–25 kHz | Narrowband FM (VHF/UHF voice). |
| WFM | 200 kHz | 80–250 kHz | Broadcast FM. |
| USB | 2.7 kHz | 1.2–4 kHz | Upper sideband voice/data. |
| LSB | 2.7 kHz | 1.2–4 kHz | Lower sideband voice (HF < 10 MHz). |
| CW | 500 Hz | 0.1–2 kHz | Morse (700 Hz tone). |
| RTTY | 1.3 kHz | 1–3 kHz | Radioteletype (decoded). |
| PSK31 | 1.2 kHz | 1–2 kHz | Keyboard-to-keyboard (decoded). |
| FT8 | 3 kHz | 2.5–3.5 kHz | Weak-signal digital (decoded). |
On KiwiSDR: WFM isn't available (KiwiSDR is HF) and falls back to NFM, and the data modes are received as plain USB — RTTY/PSK31/FT8 still decode from that audio.
6 Controls
On iPhone the controls scroll below the display; on iPad they sit in a sidebar to the right.
- BANDWIDTH
- Slider over the current mode's range; the readout shows kHz.
- GAIN
- An Auto toggle plus a manual gain slider (disabled while Auto is on).
- SAMPLE RATE
- Appears when the server offers more than one rate. Wider shows more spectrum but needs more bandwidth.
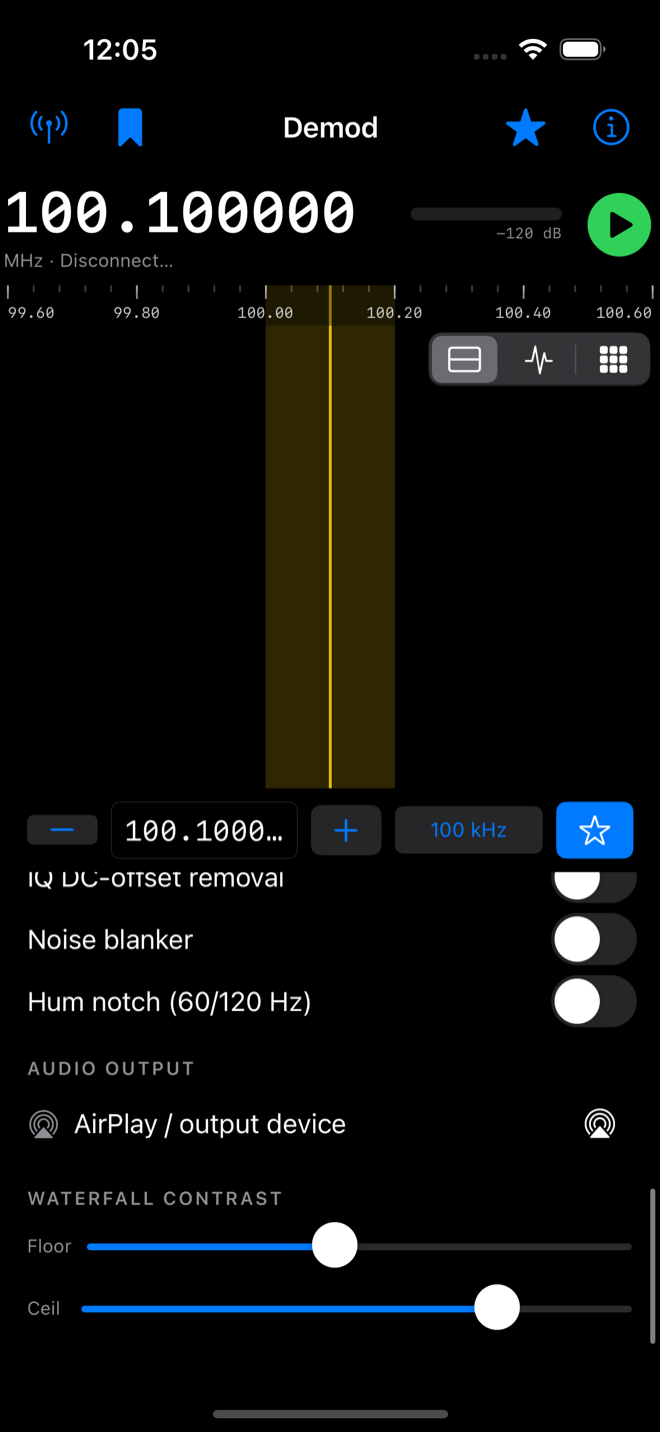
- VOLUME
- Mute button + slider. Moving the slider unmutes.
- SQUELCH
- Turn On, then set a threshold (−100…0 dB) below which audio is muted — handy for quiet FM channels.
- SIGNAL CORRECTION
- DC blocker (on by default), IQ DC-offset removal, Noise blanker (impulse/electrical noise), Hum notch (60/120 Hz) (mains hum), and — on SpyServer — Sample depth (8-bit / 16-bit).
- AUDIO OUTPUT
- An AirPlay picker to send audio to HomePod, Apple TV, or other AirPlay devices.
- WATERFALL CONTRAST
- Floor and Ceil sliders set the color range; raise the Floor to hide noise, lower the Ceil to bring up weak signals.
7 Decoders
Selecting CW, RTTY, PSK31 or FT8 in the DECODERS row turns the decoder on — there's no separate switch. Tune so the signal sits in the passband (for the data modes, centered like a USB signal).
CW / RTTY / PSK31
Decoded text scrolls across a green strip below the display ("Listening for CW…" until it locks on). Long-press to Copy text, or tap ✕ to clear.
FT8
FT8 works in 15-second slots; each slot's messages appear about 3 seconds after it ends, newest on top, with SNR and audio frequency. CQ calls are highlighted; tap a message to copy it.
FT8 depends on precise time — keep your device clock accurate.
8 Saving & recall
Two separate lists — one for where you listen, one for what you tune to.
Favorites — stations
bookmark icon, top-left
A favorite stores a server plus its tuning as a named station. Tap it to reconnect and tune; swipe to rename; Edit to reorder or delete.
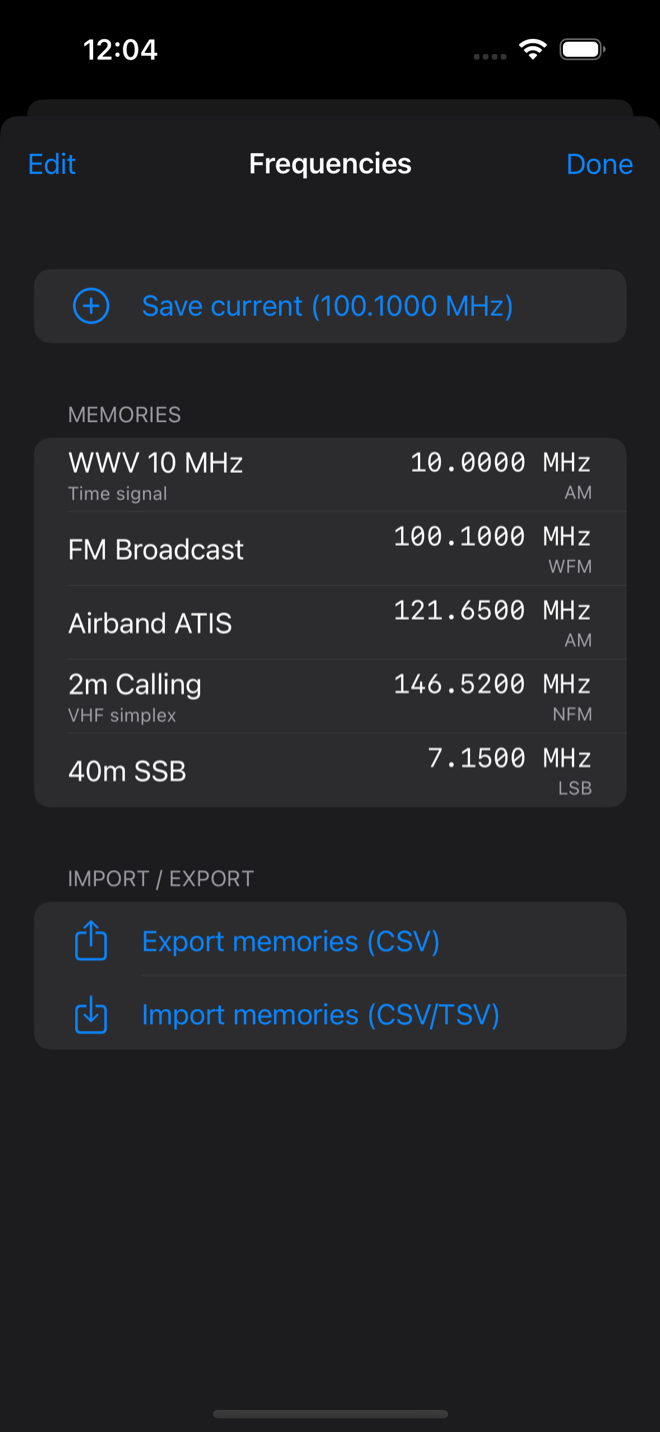
Frequencies — memories
star icon, top-right
A memory stores a frequency, mode and bandwidth. Save with the tuning-bar star. You can Export / Import CSV to move lists between devices.
On the lock screen, Play/Pause connects and disconnects, and Next/Previous step through your saved memories.
10 Tips & troubleshooting
- Connecting to your own server: make sure it listens on all interfaces
(e.g.
rtl_tcp -a 0.0.0.0), not just localhost. - Local network prompt: for a server on your Wi-Fi or over Tailscale/VPN, allow Local Network access if asked (Settings → Privacy & Security → Local Network → Demod).
- Receiving HF on an RTL-SDR: enable Direct Sampling (Q) or set an Upconverter.
- A yellow warning bar under the header means the server can't keep up in real time — try a lower sample rate, or a closer/less-busy server.
- Public servers are volunteer-run and may be slow, full, or offline — if one won't play, pick another.
11 Privacy & support
Demod collects no data — no analytics, no tracking, no ads. Connections go directly from your device to the server you choose. See the full privacy policy.
Questions, bugs, or feature requests: digitalstructures@proton.me